Project 5 - Diffusion Models
Website: https://jackie-dai.github.io/cs180-webpages/proj5/index.html
Jackie Dai - Fall 2024
Part 1
1.1 - Forward Process
Forwarding in diffusion models means to take a image and apply a certain amount of noise to it. This is achieved by the equation

Here are results of applying noise at t=250,500,750

1.2 - Classical Denoising
The reverse of forwarding is denoising x_t-1 . That is taking a image and taking away some amount of the noise. One method is by applying a Gaussian blur.
Here is the result of applying a Gaussian blur to images at t=250, 500, 750

1.3 - One-step Denoising
Using a pre-trained diffusion model, we can attempt to predict the amount of noise that was added to an image, and remove the noise.

1.4 - Iterative Denoising
In order to achieve better results, we utilize our previous method but apply it iteratively to produce cleaner image.
To save on computational power, we can skip timesteps by defining a strided_timesteps array to keep track of the timesteps we want to use. Here I am skipping every 10 timesteps.

1.5 - Diffusion Model Sampling
Now, we can generate random images by inputting a completely noisy image and denoise it based upon a prompt, “a high quality photo”.

1.6 - Classifier-Free Guidance (CFG)
The results above are of low quality, but we can up the quality by using “classifier free guidance”.
This is done by estimating conditional and unconditional noise to get our final noise.


1.7 - Image-to-image Translation
In order for diffusion models to recover a noisy image, it has to “make-up” what to replace the noisy pixels with based upon its training and prompt. Here, we can play around with the model by passing in an image and noise it a bit, then see what the model comes up with.


1.7.1 Editing Hand-Drawn and Web Images
We can have a bit more fun with this by taking hand drawn images.
Below are a couple of more own drawings followed by a web image.

1.7.2 Inpainting
This SDEditing can also be done only to a portion of our image. We can do this by masking a part of the image and letting the model recover the masked part and leave the rest of the image intact.


1.7.3 Text-Conditional Image-to-image Translation
So far, we have been using the same prompt, “a high quality photo”. Let’s change up the prompts and see how our results change.
Prompt = “a rocket ship”

Prompt=”a man wearing a hat”

Prompt = “an oil painting of an old man”

1.8 - Visual Anagrams
A neat trick we can do with our model is modify the algorithm a bit to produce optical illusions! In order to do this we will predict the noise for two different prompts, one right-side up and another upside down.

This allows us to create optical illusions, where the human eye will perceive different images depending on the orientation they are looking at the image.
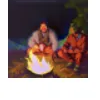
Prompt_1 = “an oil painting of people around a campfire”
Prompt_2 = “an oil painting of an old man” (upside down)
Prompt 1 = a photo of a hipster barista
Prompt 2 = a photo of a dog

Prompt 1 = a photo of the amalfi cost
Prompt 2 = a photo of a dog

1.9 - Hybrid Images
Similar to our frequency project, we can create hybrid images where you’ll see one image up close and another from far away. We can do this by simply predicting the noise for one prompt at low frequencies and another prompt at high frequencies.

a lithograph of waterfalls (close)
low_prompt = a lithograph of waterfalls
high_prompt = an oil painting of a snowy mountain village
low_prompt = a photo of the amalfi cost
high_prompt = a lithograph of a skull

Part 2: Diffusion Models from Scratch
In this section, we will be building three Neural Networks from scratch.
Unconditional Unet
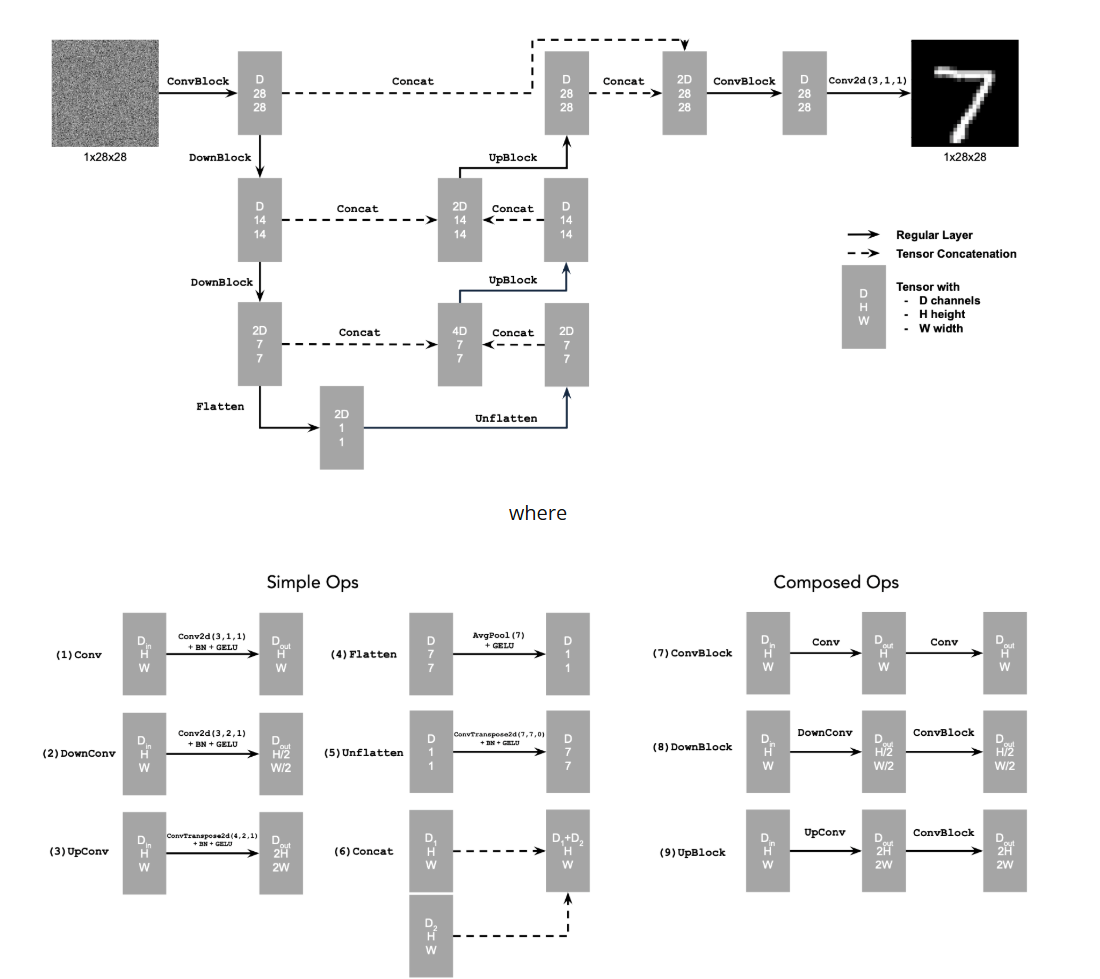
Let’s load the MINST dataset and some levels of noise to it `noise=[0, 0.2, 0.4, 0.6, 0.8, 1.0]`
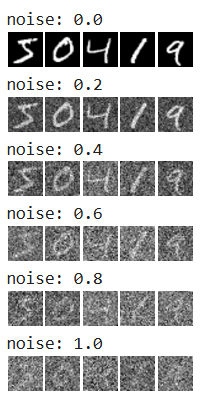
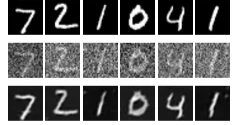
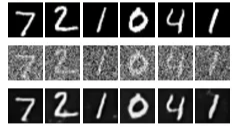
Results of denoising
1 epoch
5 epochs
Distributed noise levels
Here, I pass in a batch of images and vary the noise levels for the model to denoise.
sigma=[0, 0.2, 0.4, 0.6, 0.8, 1.0]

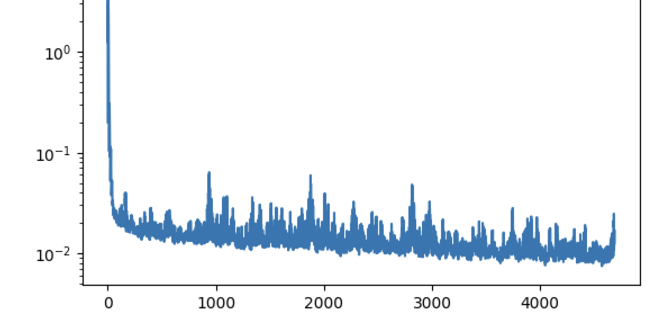
Training Loss
Time-conditioned Unet
To produce clearer images, we can implement iterative denoising.
We will be inserting two FCBlocks into our unet architecture.
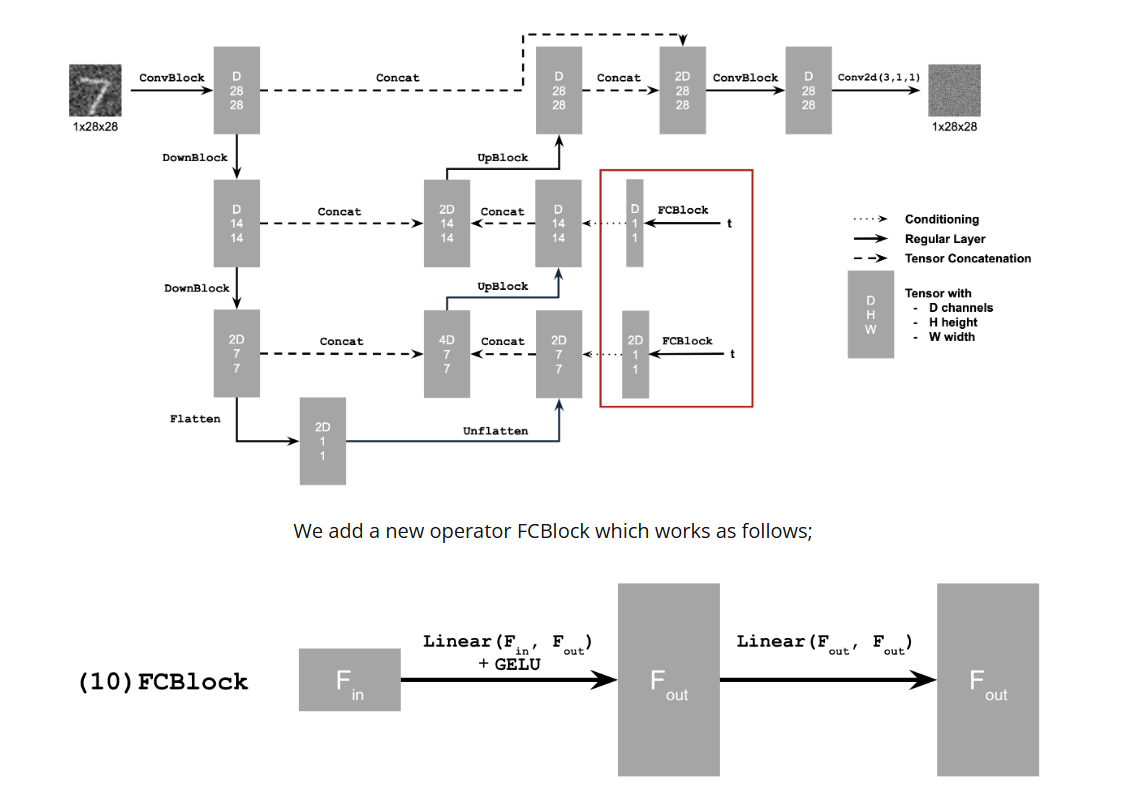
Results
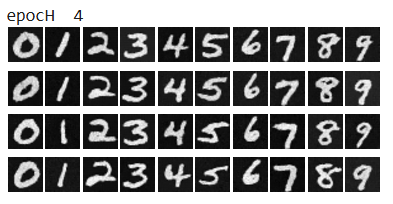
Images after 5 epochs of training

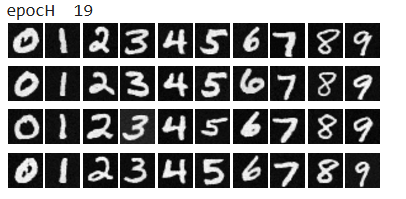
Images after 20 epochs of training

Training Loss
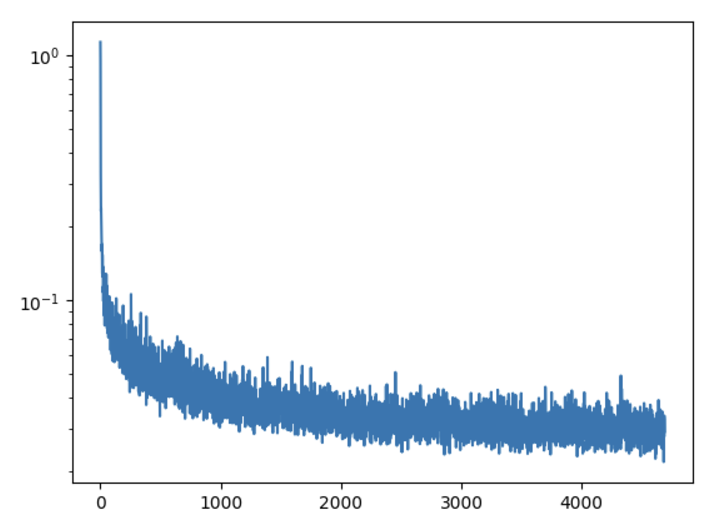
Our images look better but we can do better!
Class-conditioned Unet
In this Unet, we will add two more FCBlocks into our architecture as one-hot vectors.
Results
Training Loss
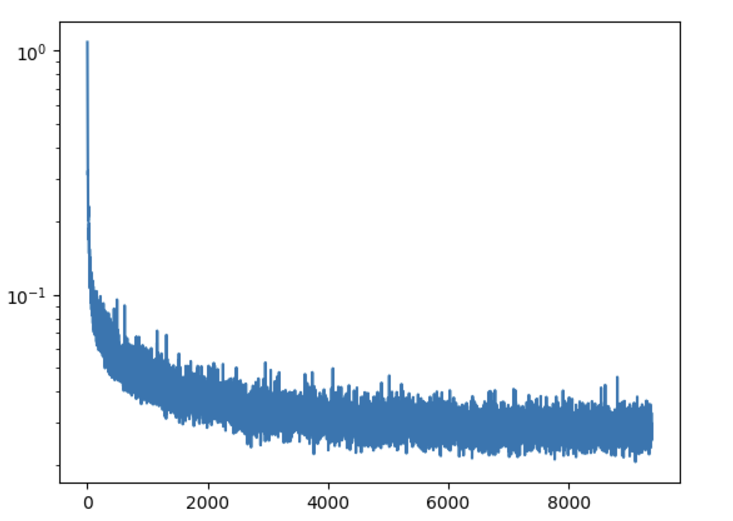
Now our images are clear as day!


